Notifications

6 minutes, 15 seconds
-22 Views 0 Comments 0 Likes 0 Reviews
We are a leading control valve manufacturer in China, providing high-quality valves and control actuators customized to meet a wide range of industrial requirements.
Pneumatic actuators are vital mechanical devices widely used in industrial applications to automate valves, dampers, and other control elements. By converting compressed air energy into linear or rotary motion, these actuators deliver efficient and reliable performance in process control systems.
Proper installation is essential to maximize functionality, longevity, and safety. This guide outlines a step-by-step process for installing pneumatic actuators, including preparation, mounting, connection, testing, and troubleshooting.
Pneumatic actuators come in several types tailored to different valve motions:
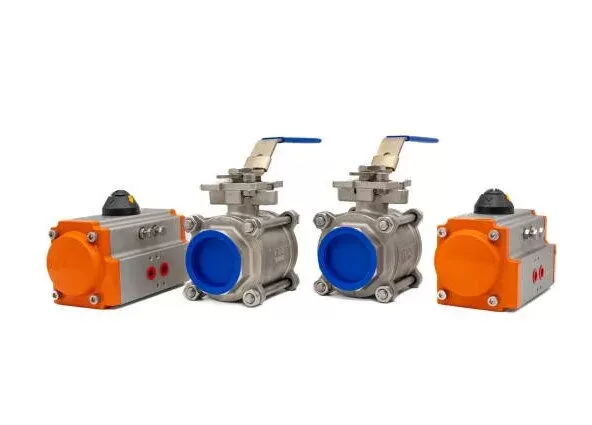
Quarter-Turn Actuators: Provide 90-degree rotational motion; commonly used for ball, butterfly, and plug valves.
Linear Actuators: Generate straight-line motion; typically used for gate and globe valves.
Rack-and-Pinion Actuators: Use gear mechanisms to produce rotary motion.
Scotch-Yoke Actuators: Designed for high torque applications and large valves.
This guide primarily addresses quarter-turn pneumatic actuators, among the most common in industrial settings.
Adjustable wrench, socket wrench, or spanners
Screwdrivers (flathead and Phillips)
Thread sealant (Teflon tape or liquid)
Torque wrench (for precise bolt tightening)
Alignment tools (if required)
Personal protective equipment (gloves, goggles, protective clothing)
Confirm actuator torque, size, and mounting pattern match the valve.
Check valve shaft type (square, round, keyed, splined) for actuator compatibility.
Depressurize the system by shutting off and locking out the compressed air supply.
Isolate the valve from hazardous fluids or pressure.
Review and follow manufacturer-specific instructions carefully.
Check actuator for damage (dents, cracks, bent shafts).
Verify valve sealing surfaces are clean and undamaged.
Ensure mounting hardware (bolts, washers, couplings) is in good condition.
Position the actuator over the valve, aligning mounting holes accurately.
For ISO-standard actuators, verify flange alignment per ISO 5211.
Insert mounting bolts and washers; tighten evenly in a criss-cross pattern.
Use a torque wrench to apply manufacturer-recommended torque settings to prevent damage.
Keyed Shafts: Slide actuator onto valve shaft, ensuring the keyway seats correctly.
Spline Shafts: Align splines carefully before securing.
Set-Screw or Clamp Couplings: Tighten securely to prevent slippage.
Typically, actuators have two ports: one for opening (extend) and one for closing (retract).
Double-acting actuators require air supply to both ports; single-acting actuators use spring return on one side.
Use compatible fittings (NPT, BSP, metric threads).
Apply thread sealant to prevent leaks; avoid over-tightening to prevent damage.
Install Air Filter/Regulator/Lubricator (FRL) unit if applicable to ensure clean, dry, and regulated air supply.
Follow manufacturer wiring diagrams for position sensors or solenoid valves.
Ensure proper grounding to prevent interference.
Test communication with control system.
Visually inspect all bolts, fittings, and connections for tightness.
Test manual override (if available) to verify smooth operation.
Gradually introduce compressed air to prevent sudden actuator movement.
Observe smooth, consistent actuator motion.
Cycle the valve multiple times to confirm repeatability.
Check for air leaks at all connections.
Verify valve fully opens and closes; adjust limit switches as needed.
Install flow control valves to regulate actuator speed if necessary.
Adjust spring preload (if supported) to optimize torque.
| Issue | Possible Cause | Solution |
|---|---|---|
| Actuator not moving | No air supply, blocked ports | Check and clear air lines |
| Slow operation | Low air pressure, restricted flow | Adjust regulator, inspect for leaks |
| Air leaks | Loose fittings, damaged seals | Tighten fittings, replace seals |
| Valve not fully closing | Misaligned shaft, incorrect limit switch | Realign shaft, adjust limit switches |
| Excessive vibration | Unbalanced load, high speed | Install dampers, adjust flow control |
Follow manufacturer recommendations for lubrication intervals and types.
Regularly inspect air lines and fittings for leaks or damage.
Annually recalibrate limit switches and sensors for accuracy.
Proper installation of pneumatic actuators is essential to ensure efficient valve operation and system longevity. By following this comprehensive guide—covering preparation, mounting, pneumatic connections, testing, and troubleshooting—you can achieve a successful and safe installation.
For complex or critical systems, always consult manufacturer documentation and engineering experts. Properly installed pneumatic actuators enhance process efficiency, reduce downtime, and contribute to safe industrial operation.
Final Tip: Keep detailed records of installation parameters, torque values, and adjustments for future reference and maintenance.Know more about Google SEO Directory

