Notifications

5 minutes, 49 seconds
-42 Views 0 Comments 0 Likes 0 Reviews
We are a leading control valve manufacturer in China, delivering high-quality valves and control actuators customized to meet a wide range of industrial requirements.
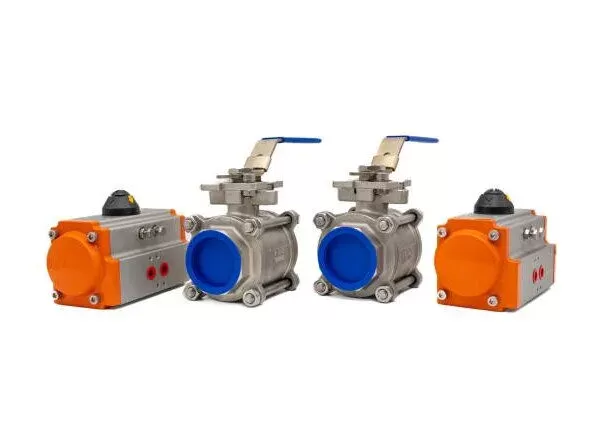
Pneumatic actuators play a vital role in automating valves, dampers, and other control devices across diverse industrial applications. By converting compressed air into linear or rotary motion, these actuators deliver reliable, efficient operation within process control systems.
Ensuring proper installation is essential for maximizing actuator performance, durability, and safety. This detailed guide walks you through the entire installation process—from preparation and mounting to connection, testing, and troubleshooting—to help you achieve smooth and trouble-free pneumatic actuator deployment.
Pneumatic actuators come in several types, each suited to different valve operations:
Quarter-Turn Actuators: Provide 90-degree rotation, ideal for ball, butterfly, and plug valves.
Linear Actuators: Convert air pressure into straight-line motion, commonly used with gate and globe valves.
Rack-and-Pinion Actuators: Use gear mechanisms for rotary motion.
Scotch-Yoke Actuators: Designed for high-torque applications, often on larger valves.
This guide focuses primarily on quarter-turn pneumatic actuators, widely used in industrial settings.
Gather Tools and Materials
Wrenches (adjustable, socket, or spanner)
Screwdrivers (flathead and Phillips)
Thread sealant (Teflon tape or liquid)
Torque wrench
Alignment tools (if necessary)
Safety equipment (gloves, goggles, protective clothing)
Verify Compatibility
Confirm actuator torque, size, and mounting pattern match the valve specifications.
Check valve shaft type (square, keyed, splined, or round) for actuator compatibility.
Safety Precautions
Depressurize and lock out the compressed air supply.
Isolate the valve from hazardous fluids or pressure during installation.
Review manufacturer instructions thoroughly.
Inspect Components
Check actuator for damage or defects.
Ensure valve sealing surfaces are clean and intact.
Verify mounting hardware condition.
Mount the Actuator
Align actuator mounting holes with the valve’s.
For ISO-standard actuators, verify proper flange alignment (ISO 5211).
Secure with bolts and washers, tightening evenly in a criss-cross pattern using a torque wrench to manufacturer specifications.
Connect the Shaft
For keyed shafts, seat the actuator onto the valve shaft with the keyway aligned.
For spline shafts, align splines correctly.
Tighten set-screws or clamps to prevent slippage.
Pneumatic Air Supply Connections
Identify air ports (usually one for opening, one for closing).
Connect air lines with appropriate fittings, applying thread sealant to avoid leaks. Avoid overtightening.
Install an Air Filter-Regulator-Lubricator (FRL) unit if applicable to ensure clean and conditioned air.
Electrical Wiring (If Applicable)
For actuators with sensors or solenoids, follow wiring diagrams carefully.
Ensure proper grounding and verify communication with control systems.
Initial Check
Verify all bolts, fittings, and connections are secure.
Test manual override functionality, if available.
Power-On and Functional Testing
Slowly apply air pressure, watching for smooth motion without jerks.
Perform multiple open-close cycles to confirm consistency.
Check for air leaks audibly or with leak detection spray.
Confirm valve reaches full travel and adjust limit switches as needed.
Performance Tuning
Adjust actuator speed via flow control valves if required.
Modify torque settings by adjusting spring preload, if supported.
| Issue | Possible Cause | Solution |
|---|---|---|
| Actuator not moving | No air supply or blocked ports | Check and clear air lines |
| Slow operation | Low air pressure or restricted flow | Adjust regulator, check for leaks |
| Air leaks | Loose fittings or damaged seals | Tighten fittings, replace seals |
| Valve not fully closing | Misaligned shaft or limit switch | Realign shaft, adjust switches |
| Excessive vibration | Unbalanced load or high speed | Add dampers, adjust flow control |
Lubricate moving parts as per manufacturer recommendations.
Inspect air lines and seals regularly for leaks or wear.
Calibrate limit switches and sensors annually for accuracy.
Correct installation of pneumatic actuators is key to achieving efficient valve automation and long-term system reliability. By following this comprehensive guide—from preparation through testing and troubleshooting—you can ensure a successful setup that maximizes actuator performance and minimizes downtime.
Always adhere to manufacturer guidelines and seek engineering expertise for complex systems. Documenting installation details such as torque settings and adjustments will facilitate future maintenance and troubleshooting.
Final Tip: A carefully installed pneumatic actuator not only improves process efficiency but also enhances safety and operational longevity in industrial environments.Know more about Google SEO Directory

