Notifications

10 minutes, 23 seconds
-11 Views 0 Comments 0 Likes 0 Reviews
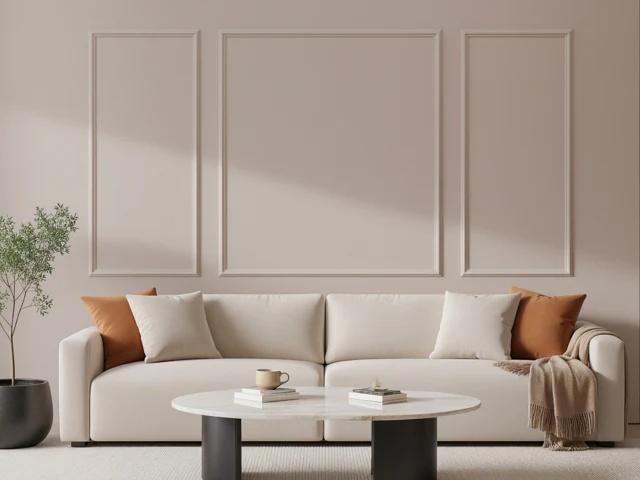
There is something truly transformative about a single wall that has been given special attention. In the world of interior design, the accent wall has long been celebrated for its ability to create focus, add drama, and define the character of a room without overwhelming the entire space. When you combine this concept with the architectural elegance of wall molding, you get something truly special: a feature wall that offers both texture and structure, depth and definition. Accent wall molding kits have emerged as the perfect solution for homeowners who want to create this impact without undertaking a full-room renovation. These focused kits provide everything needed to transform one wall into a stunning focal point, using pre-designed components that ensure professional results. Whether you want to create a dramatic backdrop for your bed, a sophisticated setting for your media console, or simply add interest to a previously forgettable space, an accent wall molding kit delivers maximum impact with minimal effort.
Understanding why feature walls have become such a enduring trend in interior design helps explain the appeal of dedicated molding kits for this purpose. A well-designed accent wall acts as an anchor for the entire room, drawing the eye and establishing a visual hierarchy that makes the space feel more intentional and composed. Unlike applying molding to every wall, which can sometimes feel overwhelming or overly formal, a single feature wall creates contrast and interest while allowing the remaining walls to recede and provide balance. This approach works beautifully in modern interiors, where the goal is often to create impact without clutter. The molding itself adds architectural interest that paint alone cannot achieve, casting subtle shadows throughout the day as light changes and creating a sense of craftsmanship and quality. Whether placed behind a bed to create a hotel-like retreat, in a living room to frame a media area, or in an entryway to establish immediate character, a molded accent wall transforms the entire room's atmosphere with surprising efficiency.
Accent wall molding kits are thoughtfully designed to include everything necessary for your feature wall project, removing the guesswork from gathering materials. Typically, you will receive all the molding pieces required to complete your chosen design, pre-cut to the exact dimensions needed for your specific wall. This includes the primary frame pieces that create the overall structure, as well as any internal dividers, decorative elements, or corner blocks that your selected pattern incorporates. The pieces are often labeled or organized to correspond with an installation diagram, making it clear exactly where each component belongs. Beyond the molding itself, most kits include the recommended adhesive, sanding materials, and detailed instructions specific to that design. Some manufacturers even provide painting supplies or finishing recommendations tailored to their products. This comprehensive approach means you can begin your project immediately upon the kit's arrival, without multiple trips to gather supplies or concerns about whether you have everything needed for success.
The range of design options available in accent wall molding kits has expanded significantly, offering choices that suit virtually any aesthetic preference. For those drawn to contemporary design, geometric patterns featuring squares, rectangles, or even hexagons create visual interest that feels fresh and modern. These designs work beautifully in living rooms, home offices, or bedrooms where you want to make a statement without traditional formality. If your taste leans toward classic elegance, traditional panel configurations with raised or recessed frames offer timeless sophistication perfect for dining areas or formal living spaces. Some kits feature asymmetrical designs that create organic, artistic compositions, ideal for bohemian or eclectic interiors. The profiles themselves range from sleek and minimalist to more ornate options, allowing you to fine-tune the level of detail to match your vision. This variety ensures that whatever your style, you can find an accent wall molding kit that brings your design concept to life with professional precision.
Before your kit arrives, thoughtful planning ensures that your accent wall will integrate seamlessly with your room's existing architecture and furnishings. Begin by considering the wall you have chosen and how the molding design will interact with windows, doors, and other architectural features. A well-planned layout acknowledges these elements rather than competing with them, perhaps framing a window as part of the overall composition or aligning panel divisions with furniture placement. Consider the scale of your room and the size of the wall itself. Larger walls can accommodate bolder patterns with bigger panels, while smaller walls benefit from more delicate scaling that maintains proportion. Think about how the finished wall will relate to your furniture. A design behind a sofa or bed might center the main panel at seating or sleeping height, creating a natural focal point. Take measurements carefully and consider using painter's tape to outline your proposed design on the wall, allowing you to live with the layout for a day and confirm that the proportions feel right before installation begins.
With your planning complete and kit in hand, installation proceeds in a logical sequence designed for DIY success. Begin by ensuring your wall surface is clean, smooth, and properly prepared, as this foundation affects both adhesion and final appearance. Lay out all kit components according to the provided diagram, familiarizing yourself with how the design comes together. Many kits recommend starting with the largest or most central elements first, building outward from there. Apply the recommended adhesive to the back of each piece, following manufacturer guidance for coverage and placement. Press each piece firmly into place along your layout lines, using a level to verify that everything remains properly oriented. For designs incorporating corner blocks or decorative elements, these typically install first, with straight pieces fitting between them. The pre-cut precision means pieces should align perfectly, requiring minimal adjustment. Work systematically through your design, checking alignment as you go and making minor adjustments before adhesive sets. The process moves quickly, allowing you to watch your feature wall take shape in real-time.
The final steps of your accent wall project elevate the installation from complete to truly spectacular. Once all adhesive has cured according to manufacturer recommendations, inspect every joint and seam. Apply a thin bead of paintable caulk along the lines where molding meets wall, as well as at any corner joints, then smooth with a wet finger to create invisible transitions. This simple step eliminates shadows and gaps, creating that seamless, built-in appearance that distinguishes professional work. If you used any additional fasteners, fill these holes and sand smooth. With all surfaces prepared, apply primer if needed, then paint with your chosen color. Here you have creative decisions to make. Painting the molding the same color as the wall creates subtle texture and shadow play, adding depth without contrast. For bolder impact, choose a contrasting color that makes the architectural lines pop, or even paint the interior of panels a different shade for dimensional effect. Once painting is complete, step back and admire your work. The new accent wall will immediately become the focal point of your room, influencing furniture placement, art selection, and the overall atmosphere. Whether you style it simply, letting the architecture speak for itself, or use it as a backdrop for curated displays, your molded feature wall will provide lasting satisfaction and transform your space in ways that feel both dramatic and effortless.

